
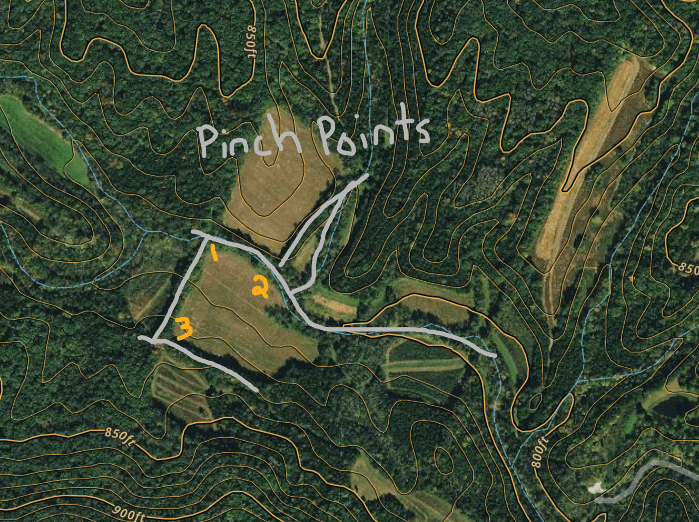

Let’s be honest—if you’ve spent any time in the deer woods, you’ve probably made at least one questionable decision. Maybe it was hanging a stand in the wide open because “it just felt right,” or chasing a ghost buck across three drainages because he might have been a shooter. We’ve all been there. But if you’re ready to make fewer bad decisions and more backstrap-worthy ones, it’s time to let terrain do the heavy lifting for you.
This chapter of the Playbook is all about how to find deer funnels and pinch points—the natural traffic jams where whitetail movement compresses and your odds skyrocket. Think of them as the whitetail version of rush hour, minus the honking and road rage (though you might still mutter a few words if you blow the shot). Once you learn how to let terrain, cover, and edges force deer past your setup, you stop hoping for luck and start hunting with intention.
Deer Funnels and Pinch Points: Why They Matter
Great deer hunting isn’t about sitting where it “feels good.” It’s about understanding deer funnels and pinch points and how whitetails move through a landscape. Funnels are broad travel zones that guide movement. Pinch points are the tight chokeholds where that movement gets compressed into a narrow path—often inside bow range.
If you learn how to find deer funnels and pinch points, you instantly stack the odds in your favor. Instead of watching deer drift randomly out of range, you’re hunting where multiple trails merge, where cover and terrain leave deer with only a few good options. Those are the places where encounters become predictable instead of accidental.
Pinch points: Narrow areas where terrain, vegetation, water, or man-made obstacles restrict deer movement into a tight lane. Think fence gaps, narrow strips of timber, between a creek and a steep hillside, or where two habitat types squeeze together.
Funnels: Larger zones or corridors that generally direct deer from one area to another—creek bottoms, long hedgerows, narrow timber blocks, ditch systems, or ridge lines connecting bedding and feeding areas.
Simple rule: Funnels direct deer movement. Pinch points concentrate it. When you find both in the same spot, that’s where you hang a stand.

Map Reading for Deer Hunting: Your Shortcut to Better Spots
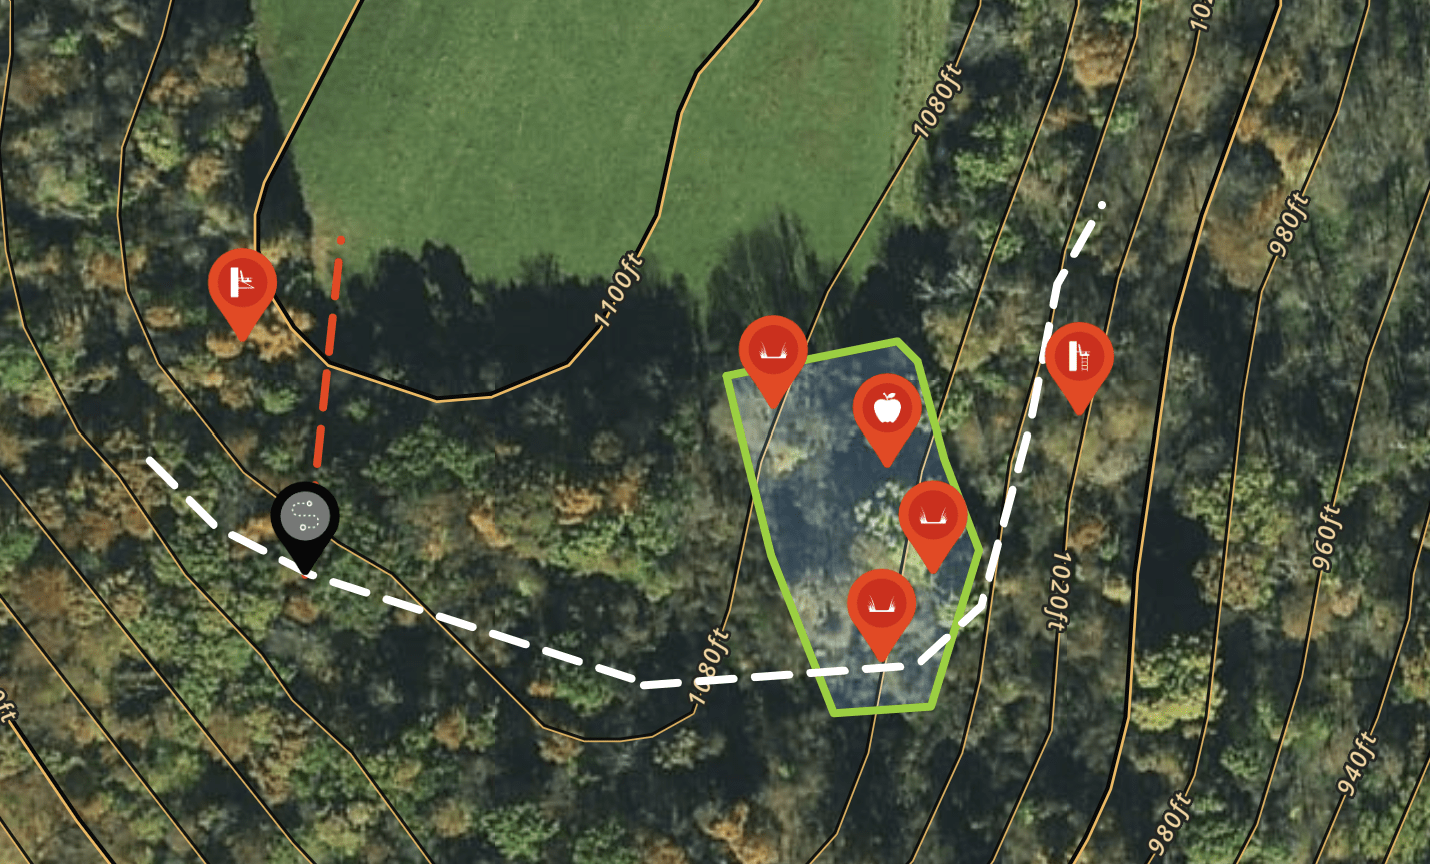
Before you ever touch a treestand or cut a shooting lane, you should be studying maps. Modern e-scouting tools—OnX, HuntStand, Basemap, Google Earth—let you identify prime terrain features from your kitchen table. If you want to master how to find deer funnels and pinch points, map reading is non-negotiable.
Topographic Map Reading for How to Find Deer Funnels and Pinch Points
Topographic maps use contour lines to show elevation changes. Tight lines mean steep slopes; wider spacing means gentler terrain. Deer hate wasting energy and exposing themselves on open high ground when easier, safer routes exist. That’s why terrain creates natural funnels.
- Look for saddles—low spots between two higher points.
- Find ridges that taper into narrow crossings or benches.
- Trace drainages where side hills, valleys, and creeks converge.
When you see multiple terrain features forcing movement into a narrow gap, you’re looking at the skeleton of a funnel. From there, your job is to confirm with sign on the ground.
Aerial Map Reading for Deer Funnels and Pinch Points
Aerial imagery shows you habitat diversity—timber, ag fields, CRP, swamps, clear cuts, and more. Deer travel where edges meet: timber to field, swamp to high ground, brush to hardwoods. If you want to know how to find deer funnels and pinch points fast, focus on where these habitat edges tighten, bend, or pinch.
- Zoom out to see big-picture travel routes between bedding and feeding.
- Zoom in to find inside corners, timber necks, and narrow strips of cover.
- Mark every spot where deer “have” to go to stay hidden while traveling between key resources.

Deer Funnels for Rut Hunting: High-Traffic Terrain
Some funnels are good all season. Others become lethal when the rut kicks in and bucks start covering ground, scent-checking doe groups, and cruising between bedding areas. If you want to capitalize on the chaos of November, understanding deer funnels for rut hunting is huge.
Saddles – Rut Highways in Hill Country
Saddles—those low spots between two ridges—are classic rut funnels. Bucks travel ridge systems to check multiple bedding areas without dropping into every hollow. When they need to cross from one side of a ridge to another, they almost always use the saddle. Combine that with nearby doe bedding, and you’ve found one of the best places to sit during the rut.
On a topo map, find where contour lines create a soft “hourglass” or narrow neck in the ridge. In person, you’ll see a gentle dip or low spot with trails cutting across. If you truly understand how to find deer funnels and pinch points, saddles will be on your list every time you scout a new property.
Creek Bottoms – The Whitetail Expressway
Creek bottoms check every box: cover, security, moisture, shade, and consistent travel. Steep ridges or open ag fields on both sides push deer into the cover of the creek corridor. During the rut, bucks run these bottoms to scent-check doe trails and crossing points.

On maps, look for a creek flanked by tight contour lines (steep slopes) or bordered by open ground. Then find the shallowest, most accessible crossing points. Those are natural choke zones where trails converge and where bucks will cruise looking for does.
Narrow Timber Strips – Wooded Highways Between Bedding Areas
When two big blocks of timber are connected by a thin strip of woods, you’ve found a prime rut funnel. Bucks use these “safe corridors” to travel between bedding groups, checking for hot does without exposing themselves in open fields.

As a rule of thumb, the narrower the timber, the more condensed the movement. If that strip also crosses a ditch, fence, or change in elevation, it becomes both a funnel and a pinch point—exactly what you want.
Deer Pinch Point Setups for High-Percentage Shots
Funnels show you general travel. Pinch points show you where to kill. Once you’ve identified the macro movement, your next job is dialing in precise deer pinch point setups that put deer inside your effective range without busting you on wind or access.
Inside Corners – Tight, Predictable Travel Lanes
Inside corners are where fields or habitat edges bend inward, forming a 90-degree pocket. Deer hate stepping out into open fields if they don’t have to. Instead, they hug the cover along that bend, staying just inside the timber as they travel. That makes inside corners dynamite ambush locations.

On aerial maps, look for sharp bends where timber or thick cover forms an “L” or inverted “C” around open ground. Add a drainage or slight terrain change nearby, and you’ve turned a good spot into a killer pinch point.
Fence Gaps and Blowdowns – Micro Pinch Points
Some of the best deer pinch point setups are tiny—just a few yards wide. A single gap in an old fence or a blowdown across a trail forces deer to pass in one small window. These are perfect for bowhunters who want close, controlled shot opportunities.
Walk old fence lines, especially where trails intersect them. Look for hair on the wire, worn ground, or spots where deer have obviously ducked under or around obstacles. Mark them in your mapping app and think hard about prevailing winds and access before hanging a set.
Ditch Crossings and Drainages – Forced Crossings You Can Predict
Drainages and ditches shape how deer move through rugged terrain. They often run north–south or east–west and intersect bigger travel routes. Deer will walk along the edge of a ditch or drainage, then cross at the easiest point—usually where the banks are lowest or slopes flatten.

On your topo map, find the V-shaped drainages, then look for spots where the contour lines spread apart or soften near the bottom. That’s where most deer will cross. In person, you’ll see obvious trails entering and exiting those low points—prime ambush locations.
Putting It Together: Scouting Deer Funnels and Pinch Points
Finding pins on a map is only step one. The real power in knowing how to find deer funnels and pinch points comes when you ground-truth those spots and turn them into low-impact, high-odds setups.
Confirming Sign on the Ground
- Look for multiple trails converging into one path.
- Note fresh tracks, droppings, rubs, and scrapes.
- Check for historical sign—old rubs and worn trails mean long-term use.
If a funnel or pinch point looks perfect on the map but is dead quiet in person, move on. Terrain potential is great, but actual deer use is what matters. The best ambush location is where terrain, cover, and sign all agree.
Access, Wind, and Pressure
A killer funnel can be ruined by bad access. Plan routes that let you slip in and out without crossing the main travel path or blowing your scent into the funnel. In hill country, hunt the upper edges in the morning when thermals rise. In the evenings, hunts closer to the low sides or exit routes as thermals fall.
Over-hunting a great pinch point will burn it out. Treat these spots like high-value investments—hunt them when conditions are right, not just because you’re excited to sit there.
Common Mistakes When Hunting Deer Funnels and Pinch Points
- Setting up too close: Sitting directly on top of the trail instead of off to the side with a wind advantage.
- No exit plan: Leaving the stand with deer still in the funnel and educating them after dark.
- Ignoring secondary winds: Not accounting for swirling or shifting winds in drainages and saddles.
- Overlooking timing: Some funnels are morning-only or evening-only; treat them that way.
Level Up Your Map Reading for Deer Hunting
If you want to keep improving at how to find deer funnels and pinch points, the next step is sharpening your map-reading skills even further. Learning how terrain, vegetation, and access all tie together will multiply everything you’ve just read.
For a deeper dive on reading hunting maps and understanding terrain features, check out MeatEater’s guide on how to read a map for hunting . It’s packed with practical map-reading concepts that pair perfectly with the funnel and pinch point strategies in this article.
Once you start seeing the woods in terms of how to find deer funnels and pinch points, you’ll never look at a map—or a stand location—the same way again.
🔗 This article is part of the Deer Hunting for Beginners Series — your complete guide to building confidence and skill in the whitetail woods.
⬅️ Previous Article:
Understanding Deer Terrain — learn how ridges, saddles, and elevation shape deer movement.
➡️ Next Up in the Series:
Scouting 101 — how to make your digital and on-the-ground scouting efforts more effective.

Leave a Reply